
What is a baseline?
A baseline is a static copy of plan data that’s compared with actual and current data. It refers to a set of data about project that represents state before the work actually began.
Baselines helps to compare actual vs. planned. Baseline schedule means taking a copy of your schedule and set aside for comparison later on. A baseline is a snapshot/a picture of your project at a particular moment in time.
Baseline is a copy of the final approved schedule. It is the target to aim. As much is possible, the baseline should remain the same throughout the project.
What information does a baseline store?
A baseline saves nearly 20 pieces of information, including totals and time phased information for tasks, resources, and assignments. You can save 1 baseline. Baseline will essentially store 5 things: cost, work, duration, start date and finish date. The baseline is a copy of the Start, Finish, Work, and Cost for all the Resources, plus Duration for all the Tasks in your project. When you do a baseline you save the following data about the project at that specific point in time.
How do I set a Baseline for the entire project?
To set a Baseline for the entire project click Project – Set Baseline. In the Set Baseline dialog select “Entire project” and click the “OK” button. This way the Baseline for the Entire Project will be set. The Baseline will be set when you Save your project.
How do I set a Baseline for selected tasks?
To set a Baseline for selected tasks, first select the tasks (using the Shift or Ctrl keys) then go to Project – Set Baseline. In the Set Baseline dialog select “Selected tasks” and click the “OK” button. This way the Baseline for the selected tasks will be set. The Baseline will be set when you Save your project.
How can I see the Baseline information?
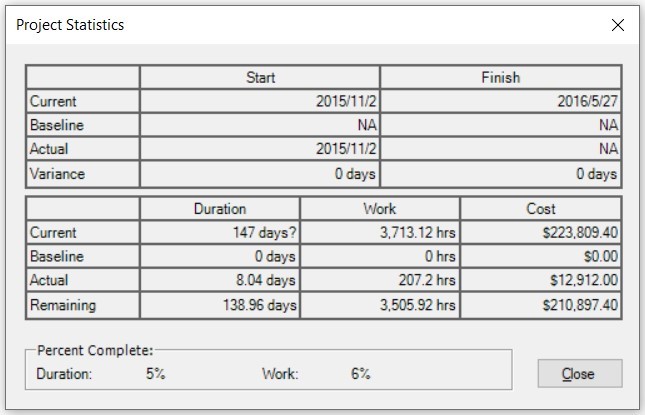
To see the Baseline Information, on the File menu – Info tab – Project Statistics.
How can I compare the baseline and the scheduled information?
You can compare the baseline to the scheduled information in two ways. Either you click on the View menu – Table – Variance or, if you want to view the variance information graphically by using the Tracking Gantt View, on the View menu – click Tracking Gantt.
What information does the Variance table provide?
The Variance table shows start and finish dates for both scheduled information and baseline information, making it possible to evaluate your prediction of how the project would progress (baseline) by comparing that prediction with how the project is in fact progressing (actual).
How to show delay impact?
In order to record these delays, you need to set a baseline for your project after you finished your plan. After this, if you have a delay, you can change the Start/Finish Date for your tasks and see how it may affect your schedule.
How do I update a cost during project tracking?
After you created your project, please set a Baseline. After this, if there are changes applied to costs, please update the Cost column. The Cost field will be the Actual Cost and the Baseline Cost will be the Planned Cost.
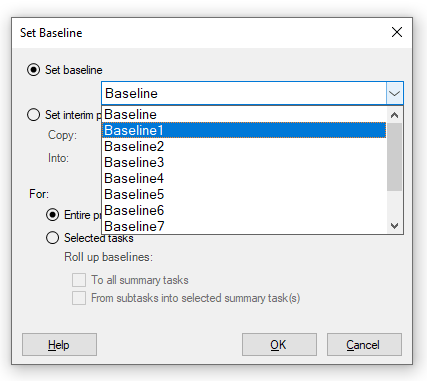
How do I set multiple baselines for the entire project?
To set multiple baselines for the entire project, in the desired project, go to menu Project – Set Baseline - from the Set baseline field, select a different Baseline option, select the Entire Project option then click OK.
How do I set multiple baselines for selected tasks?
To set multiple baselines for selected tasks, in the desired project, select the desired tasks (using the Shift or Ctrl keys), then go to menu Project – Set Baseline - from the Set baseline field, select a different Baseline option, select the Selected Tasks option then click OK.
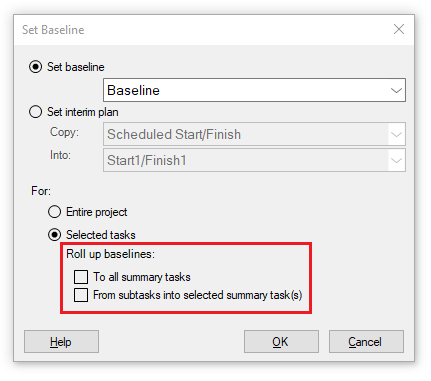
How to set a baseline for selected tasks and roll up all summary tasks?
To set a baseline for selected tasks and roll up all summary tasks, in the desired project, select the desired tasks (using the Shift or Ctrl keys), go to menu Project – Set Baseline – select the desired baseline from the Set Baseline field - check the Selected Tasks option. From the Roll up baselines section check the “To all summary tasks” option and click OK. The baseline fields for the selected tasks will be updated with the baseline values and all the parent summary tasks.
How to set a baseline for selected tasks and roll up to selected summary task(s)?
To set a baseline for selected tasks and roll up all summary tasks, in the desired project, select the desired tasks and summary tasks (using the Shift or Ctrl keys), go to menu Project – Set Baseline – select the desired baseline from the Set Baseline field - check the Selected Tasks option. From the Roll up baselines section check the “From subtasks into selected summary task(s)” option and click OK. The baseline fields for the selected tasks will be updated with the baseline values and only the selected summary tasks will be updated.
What is an interim plan?
An interim plan is a set of current project data that you save after the project begins and that you can compare against the baseline.
How can I set an interim plan for the entire project?
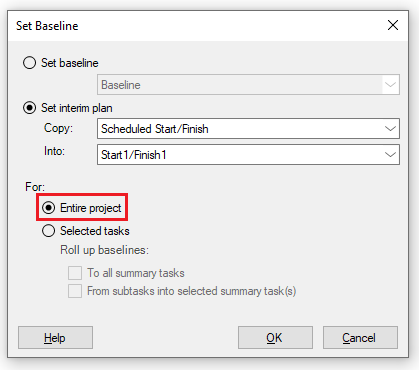
To set an interim plan for the entire project, go to menu Project – Set Baseline. Check the Set interim plan option – select the desired field from the Copy drop down menu – select the desired field from the Into drop down menu - select the Entire Project option then click OK. The fields selected from the Into dropdown will contain the values from the Copy dropdown.
Note: If the selected fields are StartX/FinishX, then only the Start/Finish values will be copied. If the fields are Baseline, then all the values for the baseline fields will be copied.
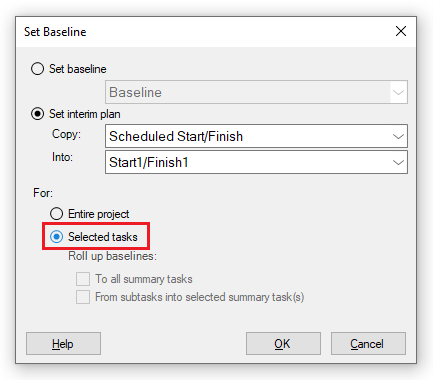
How can I set an interim plan for selected tasks?
To set an interim plan for selected tasks, in the desired project, select the desired tasks (using the Shift or Ctrl keys), then go to menu Project – Set Baseline. Check the Set interim plan option – select the desired field from the Copy drop down menu – select the desired field from the Into drop down menu - select the Selected Tasks option then click OK. The fields selected from the Into dropdown will contain the values from the Copy dropdown.
Note: If the selected fields are StartX/FinishX, then only the Start/Finish values will be copied. If the fields are Baseline, then all the values for the baseline fields will be copied.
How do I change baseline date?
To change the Baseline dates, using the Gantt Chart view, go to menu Project - Table and select Variance table. Then, you can change the Baseline Start and Finish dates.
How to manage project delays?
To register the delays on a specific task, after you finished your schedule, please set a baseline by going to menu Project – Set Baseline.
After this, if you have a delay on a task, change the Start or Finish date. In this way, the Planned Start is the Baseline Start and the Actual Start is the Start date.
How do I clear the baseline for the entire project?
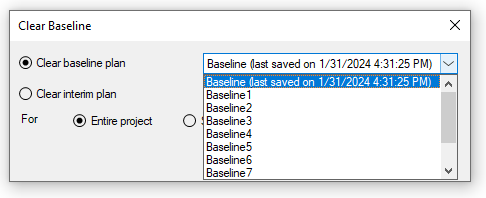
To clear the baseline for the entire project, go to the menu Project – Set Baseline – Clear Baseline. In the Clear Baseline dialog select the “Clear baseline plan” field option and from the drop-down menu select the desired Baseline – select the “Entire project” option and click the “OK” button.
How do I clear baseline for selected tasks?
To clear the baseline for selected tasks, first select the tasks (using the Shift or Ctrl keys) then go to Project – Set Baseline – Clear Baseline. In the Clear Baseline dialog select the “Clear baseline plan” field option and from the drop-down menu select the desired Baseline – select the “Selected tasks” option and click the “OK” button.
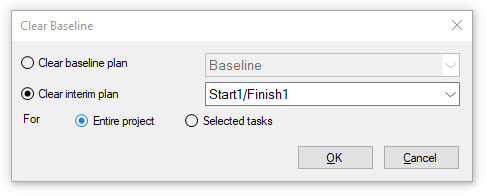
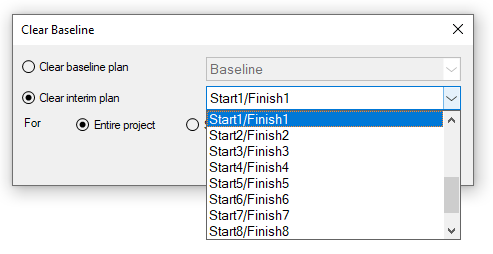
How do I clear the interim plan for the entire project?
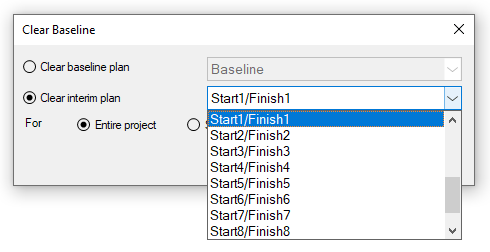
To clear the interim plan for the entire project, go to the menu Project – Set Baseline – Clear Baseline. In the Clear Baseline dialog select the “Clear interim plan” field option and from the drop-down menu select the desired field – select the “Entire project” option and click the “OK” button.
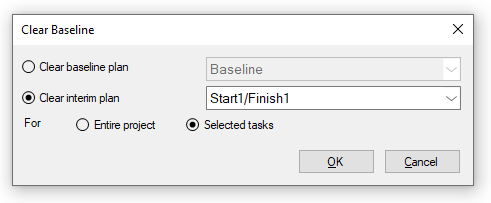
How do I clear interim plan for selected tasks?
To clear the interim plan for selected tasks, first select the tasks (using the Shift or Ctrl keys) then go to Project – Set Baseline – Clear Baseline. In the Clear Baseline dialog select the “Clear interim plan” field option and from the drop-down menu select the desired field – select the “Selected tasks” option and click the “OK” button.
Tips:
If the variance in your project doesn't show the values that you expect, there are several possible explanations:
- You might not have set a baseline. The variance is the baseline value compared with the actual value for a field. If there is no baseline, application calculates this difference by using a 0 value for the baseline fields, resulting in variances that are as large as the scheduled field itself. For example, suppose that you have a scheduled cost of $60 for a task. If no baseline is set, the baseline cost is $0. The Cost Variance field therefore shows $60.
- You might have added new tasks to a project but not added them to the baseline plan. In this case, you might see variances that are equal to the scheduled values.
- You might not have updated actual values for those tasks that are completed or in progress. In this case, variances might be equal to the scheduled values, or otherwise larger than you expect.
- You might have added new tasks or assigned resources and then set a baseline plan, but the baseline information for the summary task has not yet been updated. In this case, accurate variance values are showing for the individual tasks but not for summary tasks.
To review all baseline values presented on your plan, apply the Baseline table.
Baseline Fields:
Field | Copy to Baseline Field |
Cost | Baseline Cost |
Duration | Baseline Duration |
Finish | Baseline Finish |
Fixed Cost | Baseline Fixed Cost |
Start | Baseline Start |
Work | Baseline Work |
The resource fields | |
Cost | Baseline Cost |
Finish | Baseline Finish |
Start | Baseline Start |
Work | Baseline Work |
The resource assignments fields | |
Cost | Baseline Cost |
Finish | Baseline Finish |
Start | Baseline Start |
Work | Baseline Work |
Why I can’t see the “Set Baseline” button in ribbon on the Mac platform?
If the “Set Baseline” button is not visible in ribbon, please press "More" button. You should be able to find in the dropdown the button that doesn't fit inside the ribbon because of the small window size.
How do I see a planned cost vs actual cost?
After you finished your plan, set a baseline by going to menu Project – Set Baseline. After you make some changes to a task, if you want to see the actual cost, insert the Cost column in Gantt Chart view. The Planned Cost can be viewed in Baseline Cost field.
How can I see the planned %complete vs actual %complete?
At this point we don’t automatically calculate the %complete planned. As a workaround you can create a custom field of type Text and insert there the %complete planned.
In order to see the planned finish date for a task vs the actual finish date, please set a baseline by going to menu Project-Set Baseline.
After this, if you encounter some delays on tasks, please change the Start/Finish dates in the Gantt Chart view. These dates will be the actual start and finish dates. The planned dates can be seen in the Baseline Start and Baseline Finish fields.
How to add new tasks and add them to the baseline without updating baseline information for the previous tasks which are already tracked?
To set a Baseline for selected tasks, first select the tasks (using the Shift or Ctrl keys) then go to Project – Set Baseline. In the Set Baseline dialog select “Selected tasks” and click the “OK” button. This way the Baseline for the selected tasks will be set. The Baseline will be set when you Save your project.
When modifying baseline work field into the variance table does not sum to summary task. All summary totals must be recomputed manually.
The changes made to the baseline fields do not cause the project to be recalculated.
After you set a baseline, you can still edit baseline values. However, edited baseline values do not cause any recalculation of baseline work fields.
The best approach to using the Baseline Work field, would be to make the desired changes to the Work field then set a baseline.
How can I view all the baselines set in the project?
To view all the baselines set in a project, go to menu View – More Views - click on Multiple Baselines Gantt – click Apply.
Can I customize the Multiple Baselines Gantt View?
You can customize the Multiple Baselines Gantt View, by going to menu View – More Views - click on Multiple Baselines Gantt – click Apply. Go to menu Format – Bar Styles and make the desired changes for selected bars then click OK.
On what platforms is the Multiple Baselines functionality available?
The Multiple Baselines functionality is currently available on the Windows, Mac and Web platforms.
Step by step on how to set/clear baseline for the entire project:
1. After you finished your plan, go to menu Project - Set Baseline.

2. In the Set Baseline dialog select “Entire project” and click the “OK” button.
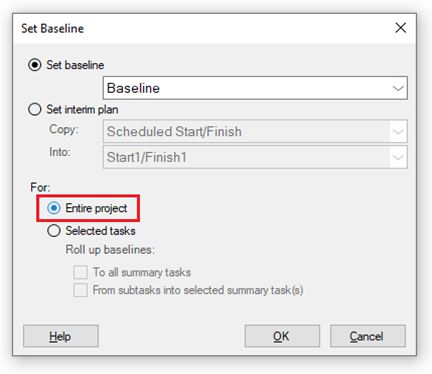
3. The Baseline for the entire project was set.
4. To clear the baseline for the entire project go to menu Project – Set Baseline – Clear Baseline.

5. From the Clear baseline plan field select the desired baseline.
6. Select “Entire project” and click the “OK” button.
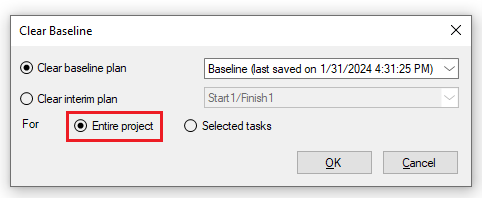
6. The Baseline for the entire project was cleared.
Step by step on how to set/clear baseline for selected tasks:
1. Select the tasks (using the Shift or Ctrl keys).
2. Go to menu Project – Set Baseline.

3. In the Set Baseline dialog select “Selected tasks” and click the “OK” button.
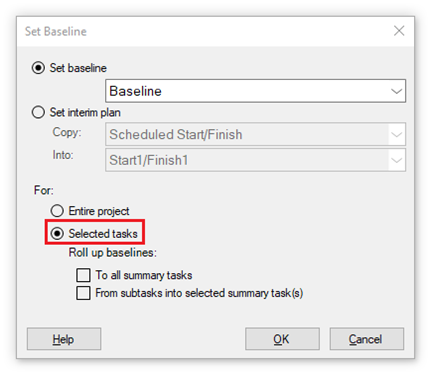
Note: Here you have the option to roll up the baselines for summary tasks as well by either selecting the “To all summary tasks” option – which also updates the baseline values of all the parent summary tasks, or the “From subtasks into selected summary task(s)” – which updates the baseline values of only the selected summary tasks.
4. The Baseline for the selected tasks was set.
5. To clear the baseline for the selected tasks go to menu Project – Set Baseline – Clear Baseline.

6. From the Clear baseline plan field select the desired baseline.
7. Select “Selected tasks” and click the “OK” button.
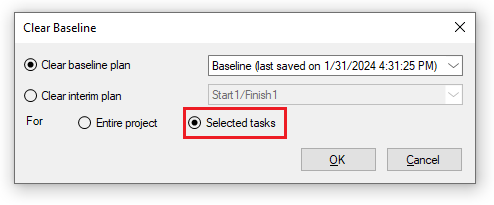
8. The Baseline for the selected tasks was cleared.
Step by step on how to set multiple baselines for the entire project:
1. Go to menu Project – Set Baseline.
2. In the Set Baseline dialog, from the Set baseline field, select a different Baseline option.
3. Select “Entire project” and click the “OK” button.
4. A new Baseline for the entire project was set.
Step by step on how to set multiple baselines for selected tasks:
1. Select the tasks (using the Shift or Ctrl keys).
2. Go to menu Project – Set Baseline.
2. In the Set Baseline dialog, from the Set baseline field, select a different Baseline option.
3. In the Set Baseline dialog select “Selected tasks” and click the “OK” button.
Note: Here you have the option to roll up the baselines for summary tasks as well by either selecting the “To all summary tasks” option – which also updates the baseline values of all the parent summary tasks, or the “From subtasks into selected summary task(s)” – which updates the baseline values of only the selected summary tasks.
4. A new Baseline for selected tasks was set.
Step by step on how to set/clear an interim plan for the entire project:
1. After you finished your plan, go to menu Project - Set Baseline.
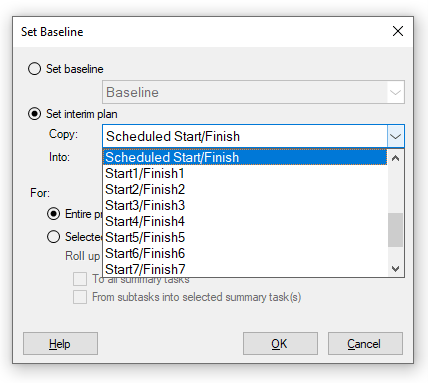
2. In the Set Baseline dialog, check the Set interim plan option.
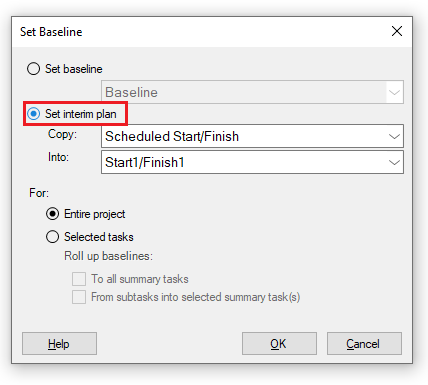
3. Select a field from the Copy drop down menu.
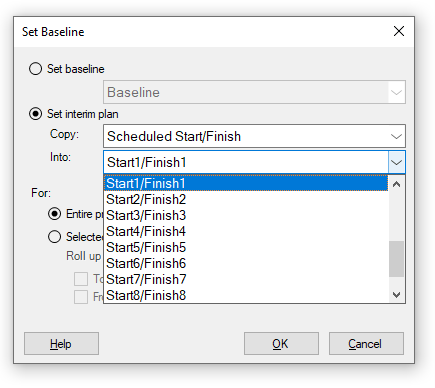
4. Select a field from the Into drop down menu.
5. Select “Entire project” and click the “OK” button.
5. The Interim Plan for the entire project was set.
6. To clear the interim plan for the entire project go to menu Project – Set Baseline – Clear Baseline.
6. Check the Clear interim plan field and select the desired interim plan.
7. Select “Entire project” and click the “OK” button.
8. The Interim Plan for the entire project was cleared.
Step by step on how to set/clear an interim plan for selected tasks:
1. Select the tasks (using the Shift or Ctrl keys).
2. Go to menu Project – Set Baseline.
3. In the Set Baseline dialog, check the Set interim plan
4. Select a field from the Copy drop down menu.
5. Select a field from the Into drop down menu.
6. Select “Selected tasks” and click the “OK” button.
7. The Interim Plan for the selected tasks was set.
8. To clear the interim plan for the selected tasks go to menu Project – Set Baseline – Clear Baseline.
6. Check the Clear interim plan option and select the desired interim plan.
7. Select “Selected tasks” and click the “OK” button.
8. The Interim Plan for the selected tasks was cleared.
Step by step on how to see the Baseline information:
1. Go to File menu - Info tab.
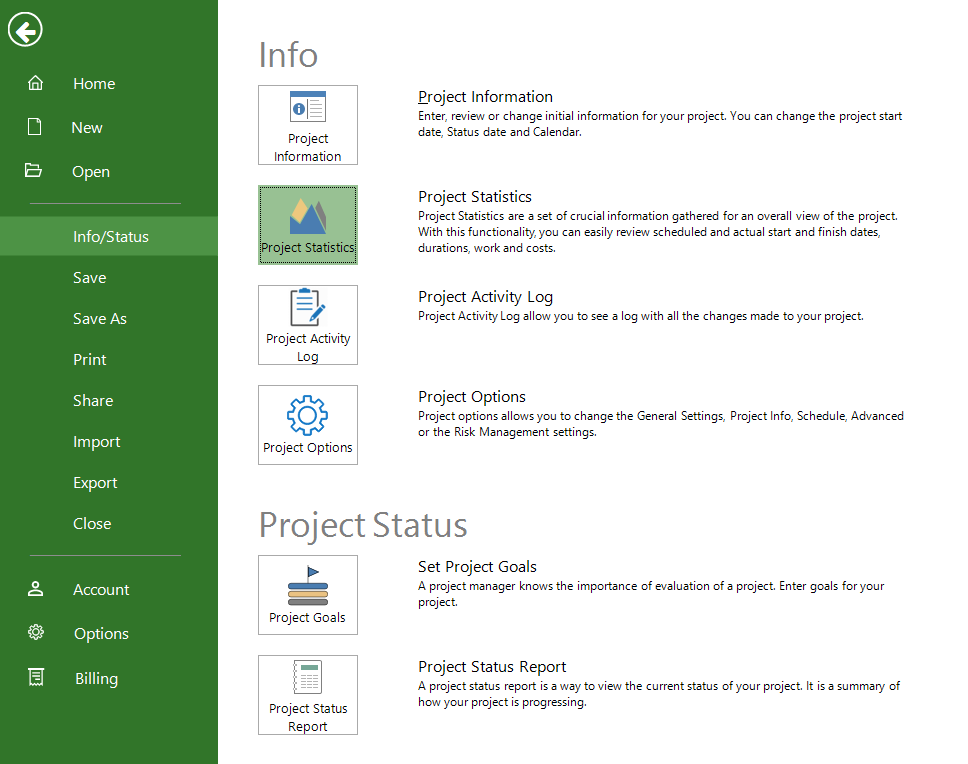
2. Click on the Project Statistics button.
Step by step on how to view the Multiple Baselines Gantt View:
1. After you set the project baselines, got o menu View – More Views.

2. Select the Multiple Baselines Gantt View and click Apply.
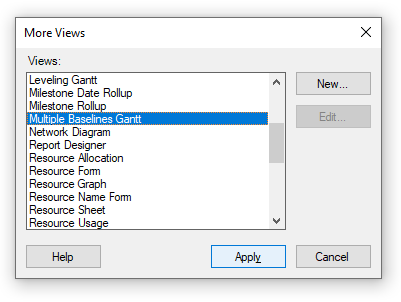
3. The Multiple Baselines Gantt View is applied.
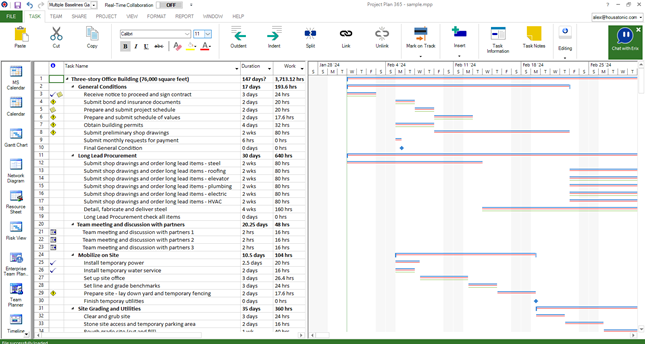
Note: You can also customize the Multiple Baselines Gantt View by going to menu Format – Bar Styles and changing the appearance of Gantt bars.

