
What does the “Print for Mac” functionality do?
The “Print for Mac” functionality allows you to print the active view of the current project on paper, by using a printer connected to your Mac OS laptop or computer.
For more information about the Print for Mac functionality and its benefits, please see the Print on Mac page, which also includes a video.
How do I print my project on Mac?
Before printing your project, we advise you to:
- Pick the view you want.
- Format the view.
- Change the view so it shows only the data you want to share. For example:
- Hide subtasks to show only top-level tasks.
- Sort tasks or dates to highlight specific info.
- Hide columns temporarily so they don't appear in the printout.
- Use the Print option from Page Setup or Print options from the main page to print the active view of the current project.
- Select a printer and the desired settings and click Print.
How can I take a full screenshot of the Gantt Chart?
To take a full screenshot of the Gantt Chart view, you can export the entire view on one page. To achieve this, go to menu File - Print. Click on the Page Setup button and a dialog will open and you will see that there is the Scaling option. Check the option Fit to 1 page wide by 1 tall. Then, go to menu File - Export - Export to PDF.
How can I print in A4 format on Mac?
To print in A4 format on Mac, go to menu File – Print - Print and select on Paper Size field the A4 format.
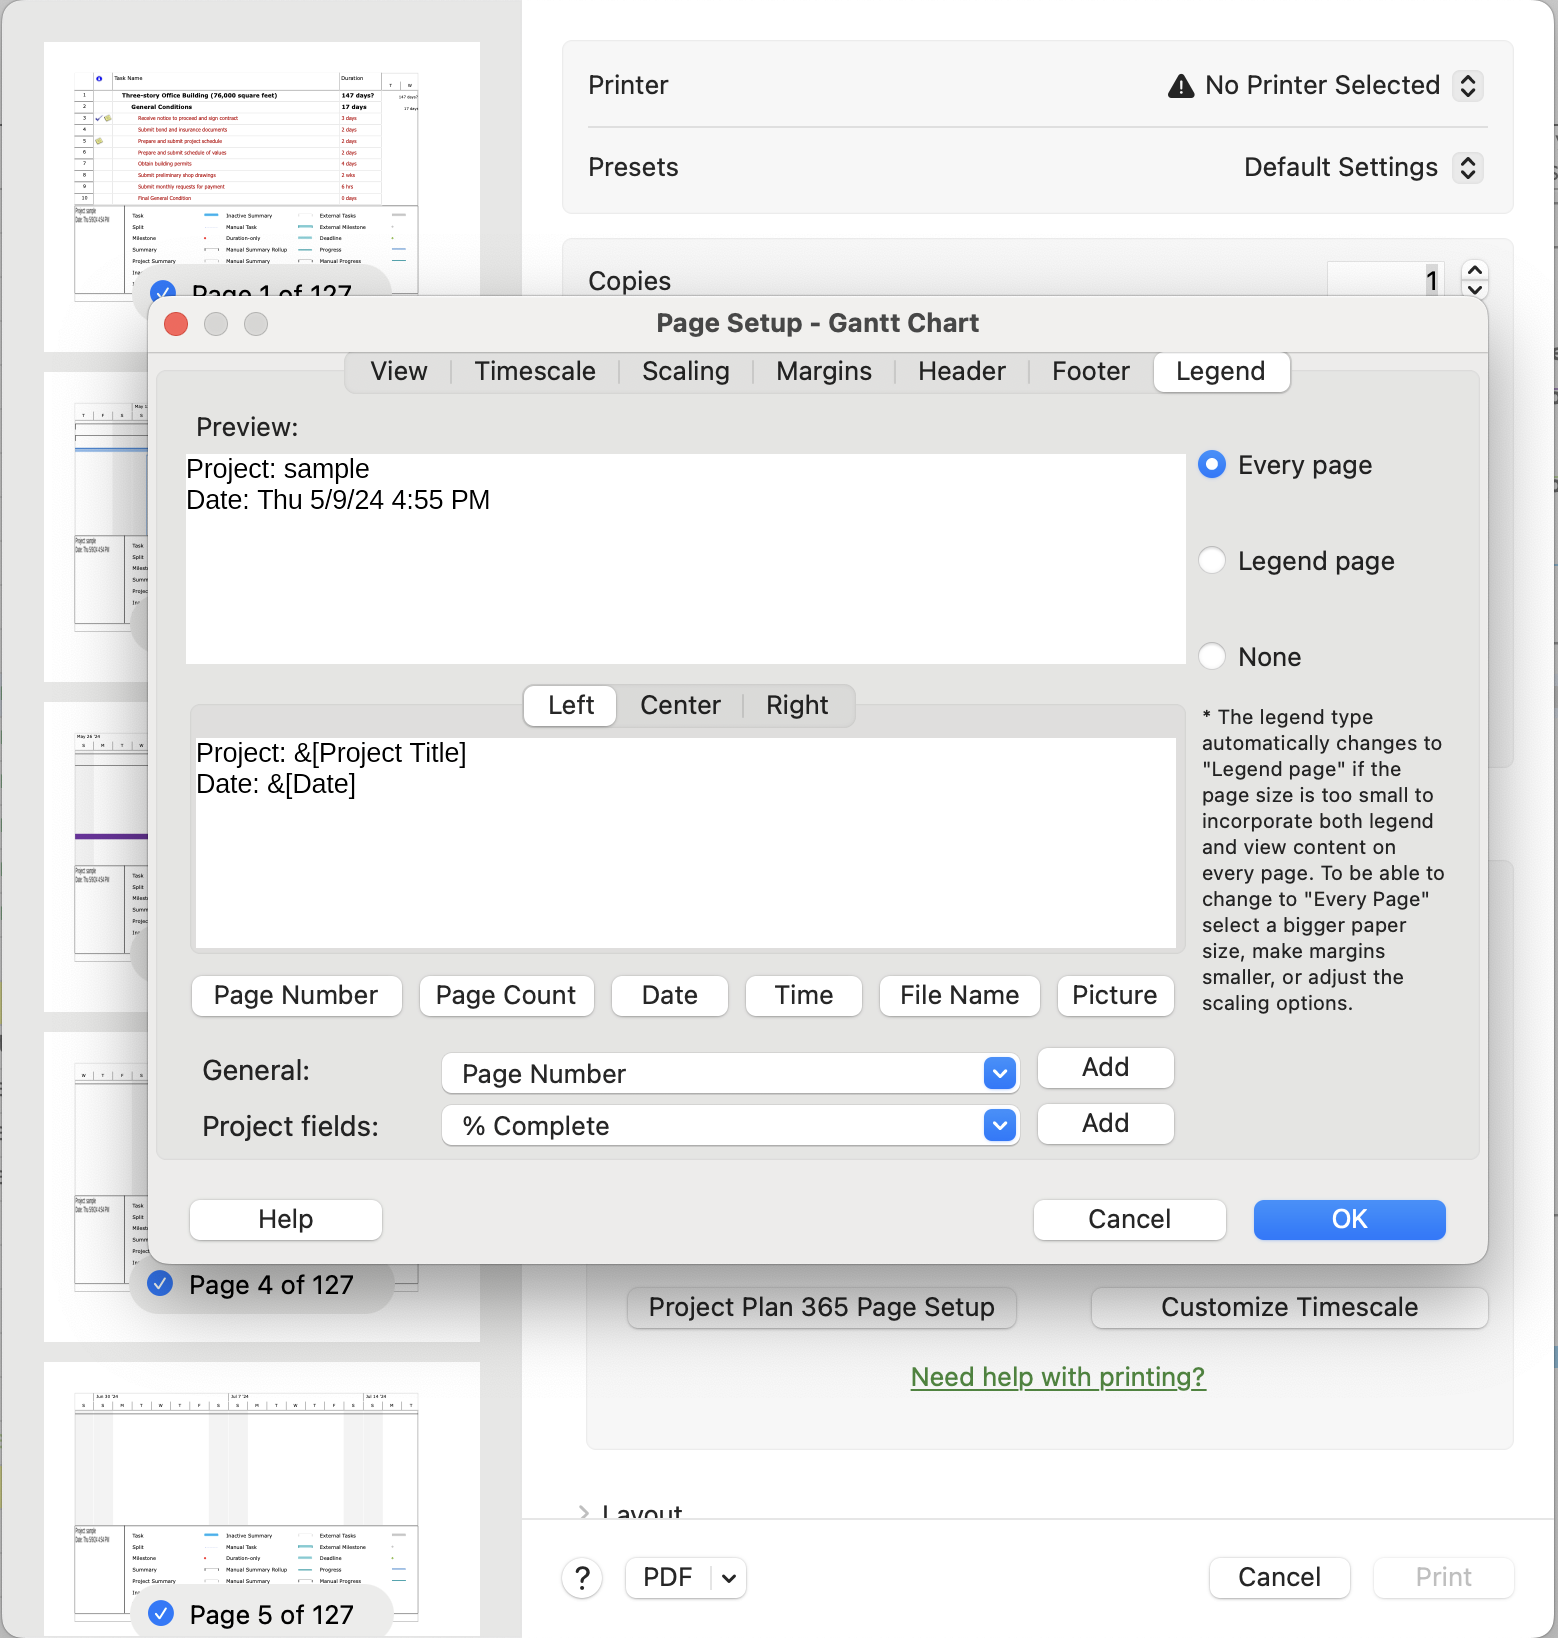
How can I see the legend on the bottom of the page?
To see the legend on the bottom of the page, please follow the steps below:
1. Go to File-Print-Page Setup.
2. Go to Legend tab.
3. Select Every page.
How do I print in landscape on Mac?
To change the orientation to Landscape, go to the File menu - Print - Print then from Orientation choose the “Landscape” option.
How do I print only the relevant data on the Gantt Chart view?
To print or export only the relevant data, first please change the view so it shows only the information that you want to print. You can filter data, hide columns or subtasks, you can sort the tasks or resources to highlight specific info. Then, go to menu File - Print - Print in order to print the active view of the current project. Select a printer and the desired settings and click Print.
How can I fit to one page?
To fit the entire project to one page, go to menu File - Print. Click on the Page Setup button and a dialog will open and you will see that there is the Scaling option. Check the option Fit to 1 page wide by 1 tall.
Where can I find the “Print between two dates for Timeline View” option?
To find the “Print between two dates” option, open the app then go to the “File” menu, select the “Print” option and then choose the “Page setup” option. A dialog will appear. Go to the “View” tab to reach the “Print between two dates” function.
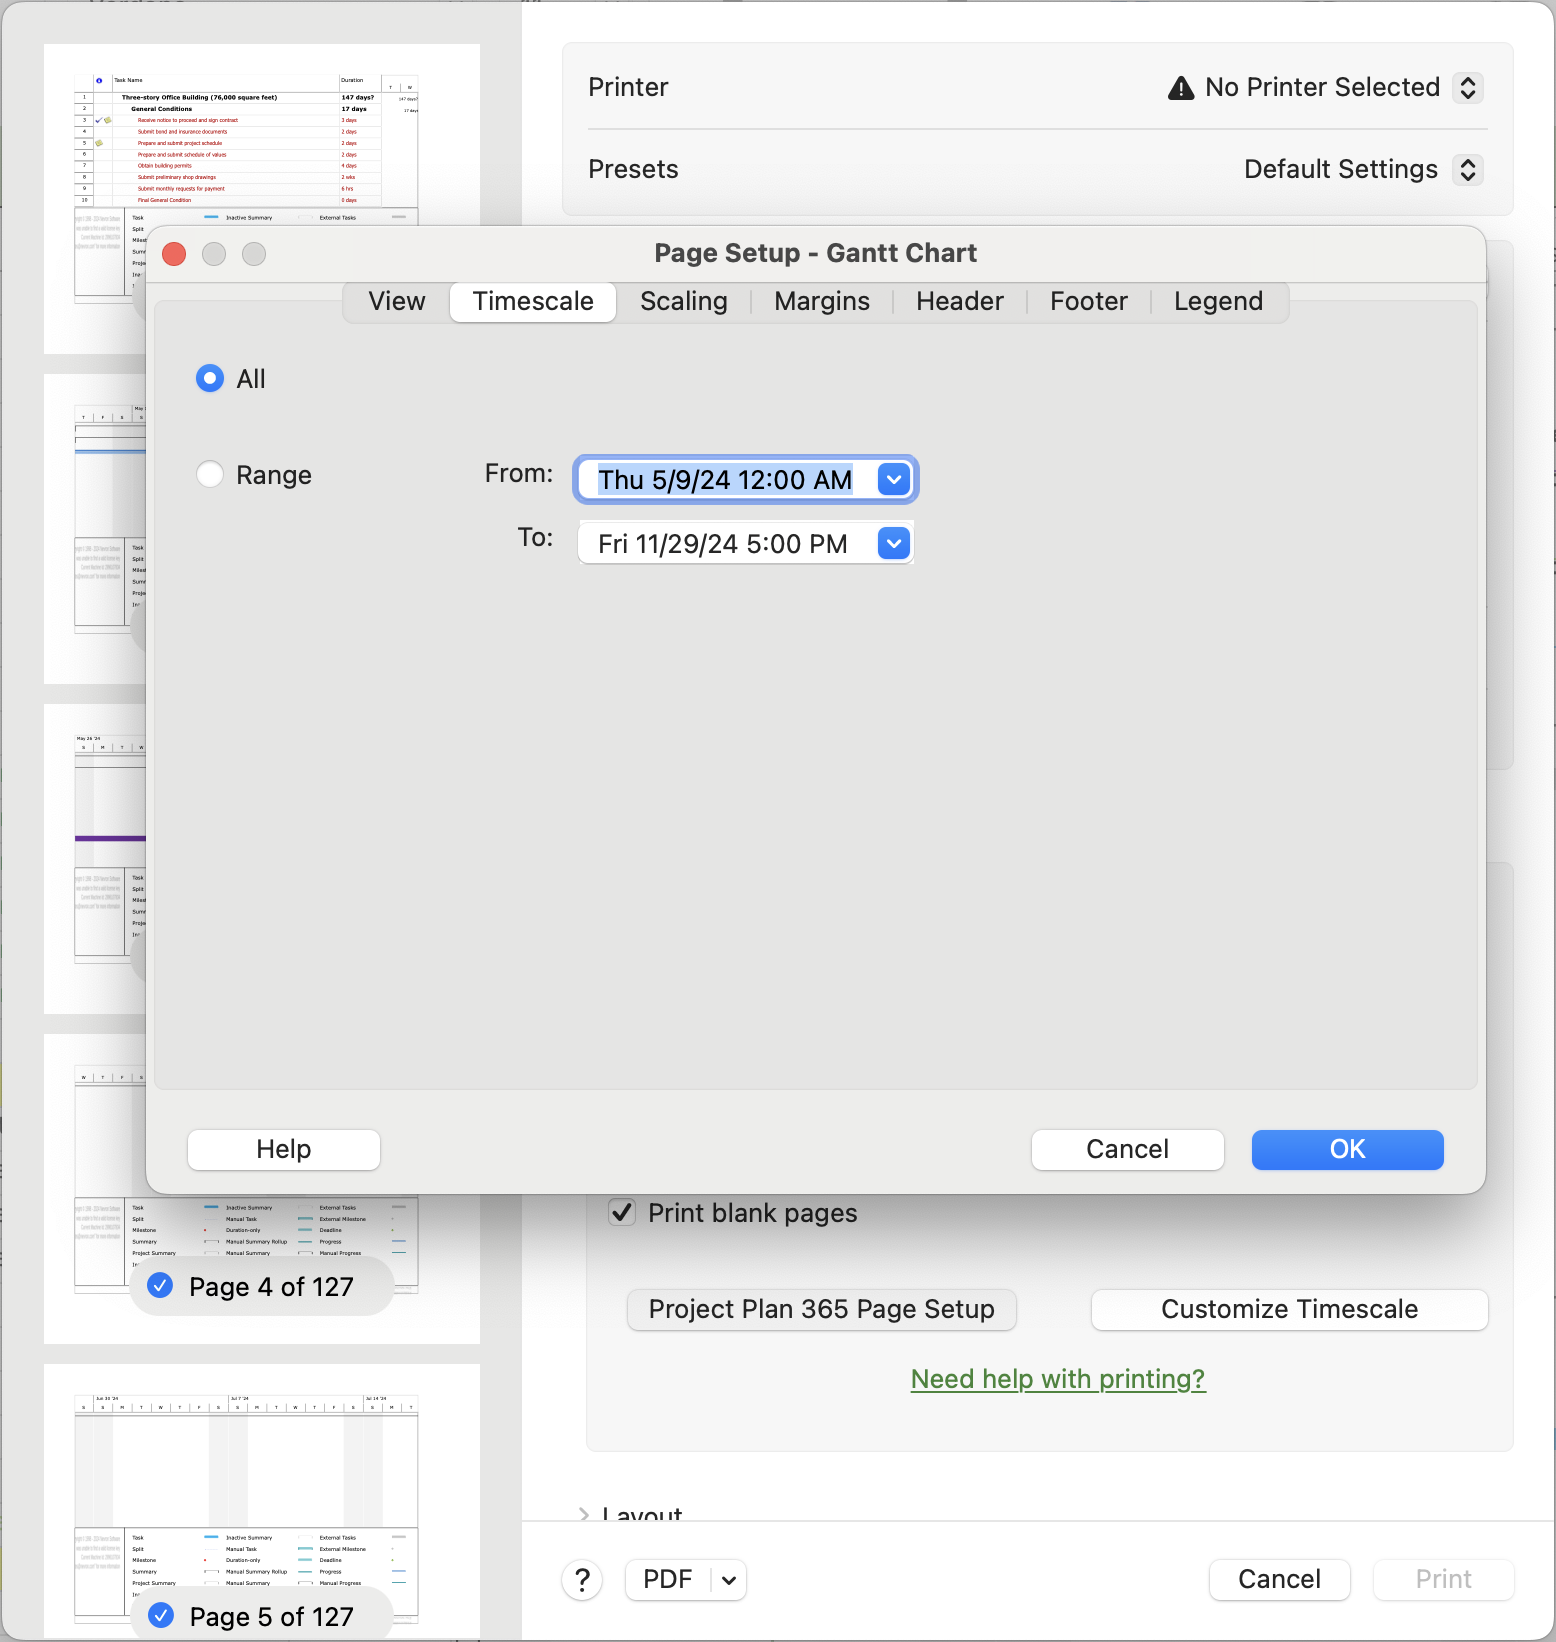
I want to do page set up but they are telling me the from date must be before to date.
Please make sure that the FROM date is before the TO date.
Where can I find the “Scaling” option?
To find the “Scaling” option you have to go to the “File” menu and choose the Print option. Click the “Page setup” option and a dialog will open and you will see that there is the Scaling option which includes the “Adjust to” and “Fit to” commands.
How do I print to PDF onto A0 or A1 paper size on Mac?
If you don’t have A0 or A1 you can create a new one (go to Print dialog and click on paper size combo box and ‘Manage Custom Sizes’) – it will be then saved.
How can I insert a logo?
To insert a logo, go to the File menu - Print - Page Setup dialog. Select Header/Footer tabs, click on "Insert Image" icon and then click on "OK" button.
How do I remove the legend from the bottom of the page when printing documents?
In order to remove the Legend, please follow the steps below:
- Go to File-Print-Page Setup.
- Go to Legend tab.
- Select None.
I want to do page set up but they are telling me the from date must be before to date.
Please make sure that the FROM date is before the TO date.
I want to print in landscape mode my project but get error: not enough memory to print.
If you try to print your project and get the error: "Not enough memory to print" you might be using a paper size which is too small and too many pages are generated for print because of the size of the project.
How can I print the Gantt Chart?
To print the Gantt Chart view, open the application, make sure the selected view is Gantt Chart and then go to the File menu - Print and select the Print option.
How can I print the current view?
In order to print the current view, make sure the desired view is selected, then go to the File menu - Print and select the Print option.
How can I combine two views and print them at the same time?
We are sorry but printing two views at the same time is not possible in our application at this point.
How can I improve the print resolution?
In order to improve the Print resolution, please set another paper size. In order to do that, go to the File menu - Print and select Page Setup option. Select the desired Paper Size and then press "OK" in the dialog for changes to take effect.
How can I print only the tasks?
To print only the tasks, please use the Task Sheet view. Then, go to the menu File - Print.
How can I print the Gantt Chart to view all bars in Gantt?
In order to obtain better printed projects and to make all the Gantt bars visible in your print, we advise to make sure that in the Page Setup dialog, in Timescale you have selected the desired dates between which to print your project.
Also, for better results, you can customize the way the time period over which your projects extends according to your needs by going to Format -> Timescale. You can show the entire Gantt in a contracted or expanded version in order to show as much of the tasks you want.
After you customized the Timescale you can go to the menu File - Print.
How can I print only the columns in Gantt Chart?
To print only the columns, please use the Task Sheet view and insert there the columns you want. Then, go to the menu File - Print.
How can I print only a column and the Gantt Chart?
If you want to print only a column, or only certain columns, you can hide the other undesired columns by selecting each one of them and then going to Format -> Hide column. When you remain with only the desired columns go to the menu File - Print.
How can I print only some tasks?
If you want the printed project to contain only certain tasks you can use the "Filter" functionality and use one of the predefined filters. Another option, which offers even more flexibility would be to use the "Autofilter" functionality. Using this, you can select the exact tasks you want to display in the view. Then, go to the menu File - Print.
How can I save the print to PDF?
From the Print dialog you can choose to print the project on paper or to a PDF file by selecting the "Save to PDF" from the "PDF" drop-down in the lower left corner of the dialog.
What does the “Customize Timescale” button inside the Print dialog do?
The “Customize Timescale” button, when clicked, opens the “Timescale” dialog which allows you to you to adjust the timescale to show smaller or greater time units, from hours all the way up to years.
What does the “Need help with printing?” hyperlink inside the Print dialog do?
The “Need help with Printing” hyperlink, when clicked, redirects us to the “Print for Mac” article on our Online Help page.
What does the “Project Plan 365 Page Setup?” button inside the Print dialog do?
The “Project Plan 365 Page Setup” button, when clicked, opens the “Page Setup” dialog which allows you to you to control the appearance of printed views.
How can I print only some specific columns?
If you want to print only some specific columns, you can hide those you don’t want to appear in your printed file. You can achieve this by selecting a column – right click on it and from the contextual menu select the “Hide Column” option. After that, go to the File menu - Print - Print in order to print the active view of the current project.
How do I change the font size and print to PDF?
In order to change the font size for all of your task, you can use the Text Styles option available in Format menu. In order to do that, follow the steps below:
- Go to the Format menu – Text Styles.
- From Items to Change make sure you select All.
- Change the size from the Size section and press OK.
After that, go to the File menu – Print - Print and select the Save to PDF option from the PDF drop-down in the lower left corner of the dialog.Another way to export you project to .PDF is to use the Export to PDF option available in Share menu – Export – Export to PDF.
How can I increase number of the printed pages for clarity?
If you want your printed file to be more clearly, you can change the Paper Size from the “Page Setup” dialog and then use the “Print Preview” option in order to see the changes made in the Page Setup dialog.
Also, please make sure you don’t have checked the “Fit to” option and that “Adjust to” is set to “100%”.
I just want to print the Gantt and not the columns. How do I do this?
In order to print only the Gantt Chart, drag to the left the bar that separates the grid from the Gantt Chart and then go to the File menu - Print - Print.
How can I change the size of the text in the header/footer on Mac?
To change the Font for Header/Footer on Mac, go to File menu - Print - Page Setup and in the Header/Footer tab type the name, select it and right-click to open the contextual menu where you can find the Font options.
How do I print the Resource Usage view?
To print the Resource Usage view, open the application, make sure the selected view is Resource Usage and then go to the File menu – Print and select the Print option.
How to define a custom page size on Mac?
On Mac, to define a custom page size with the dimensions you need, follow the steps below:
- Go to File – Print and from the Paper Size drop-down list select “Manage Custom Sizes…” option;
- Type a name and set the desired paper size;
- After that, open again the Paper Size drop-down list and select the custom paper size.
Step by step on how to prepare a view for printing and print it on Mac:
- Pick the view you want.
- Format the view.
- Change the view so it shows only the data you want to share. For example:
- Hide subtasks to show only top-level tasks.
- Sort tasks or dates to highlight specific info.
- Hide columns temporarily so they don't appear in the printout.
- Use the Print option from Page Setup or Print dialogs to print the active view of the current project. Your selected printer is shown at the top of the Print dialog box.

Printer
Lists all installed printers. To use a printer, select it from the list, or use Add Printer option to select desired shared printer.
From this dialog, you can choose how much of the project to print. You can print the whole thing or page ranges.
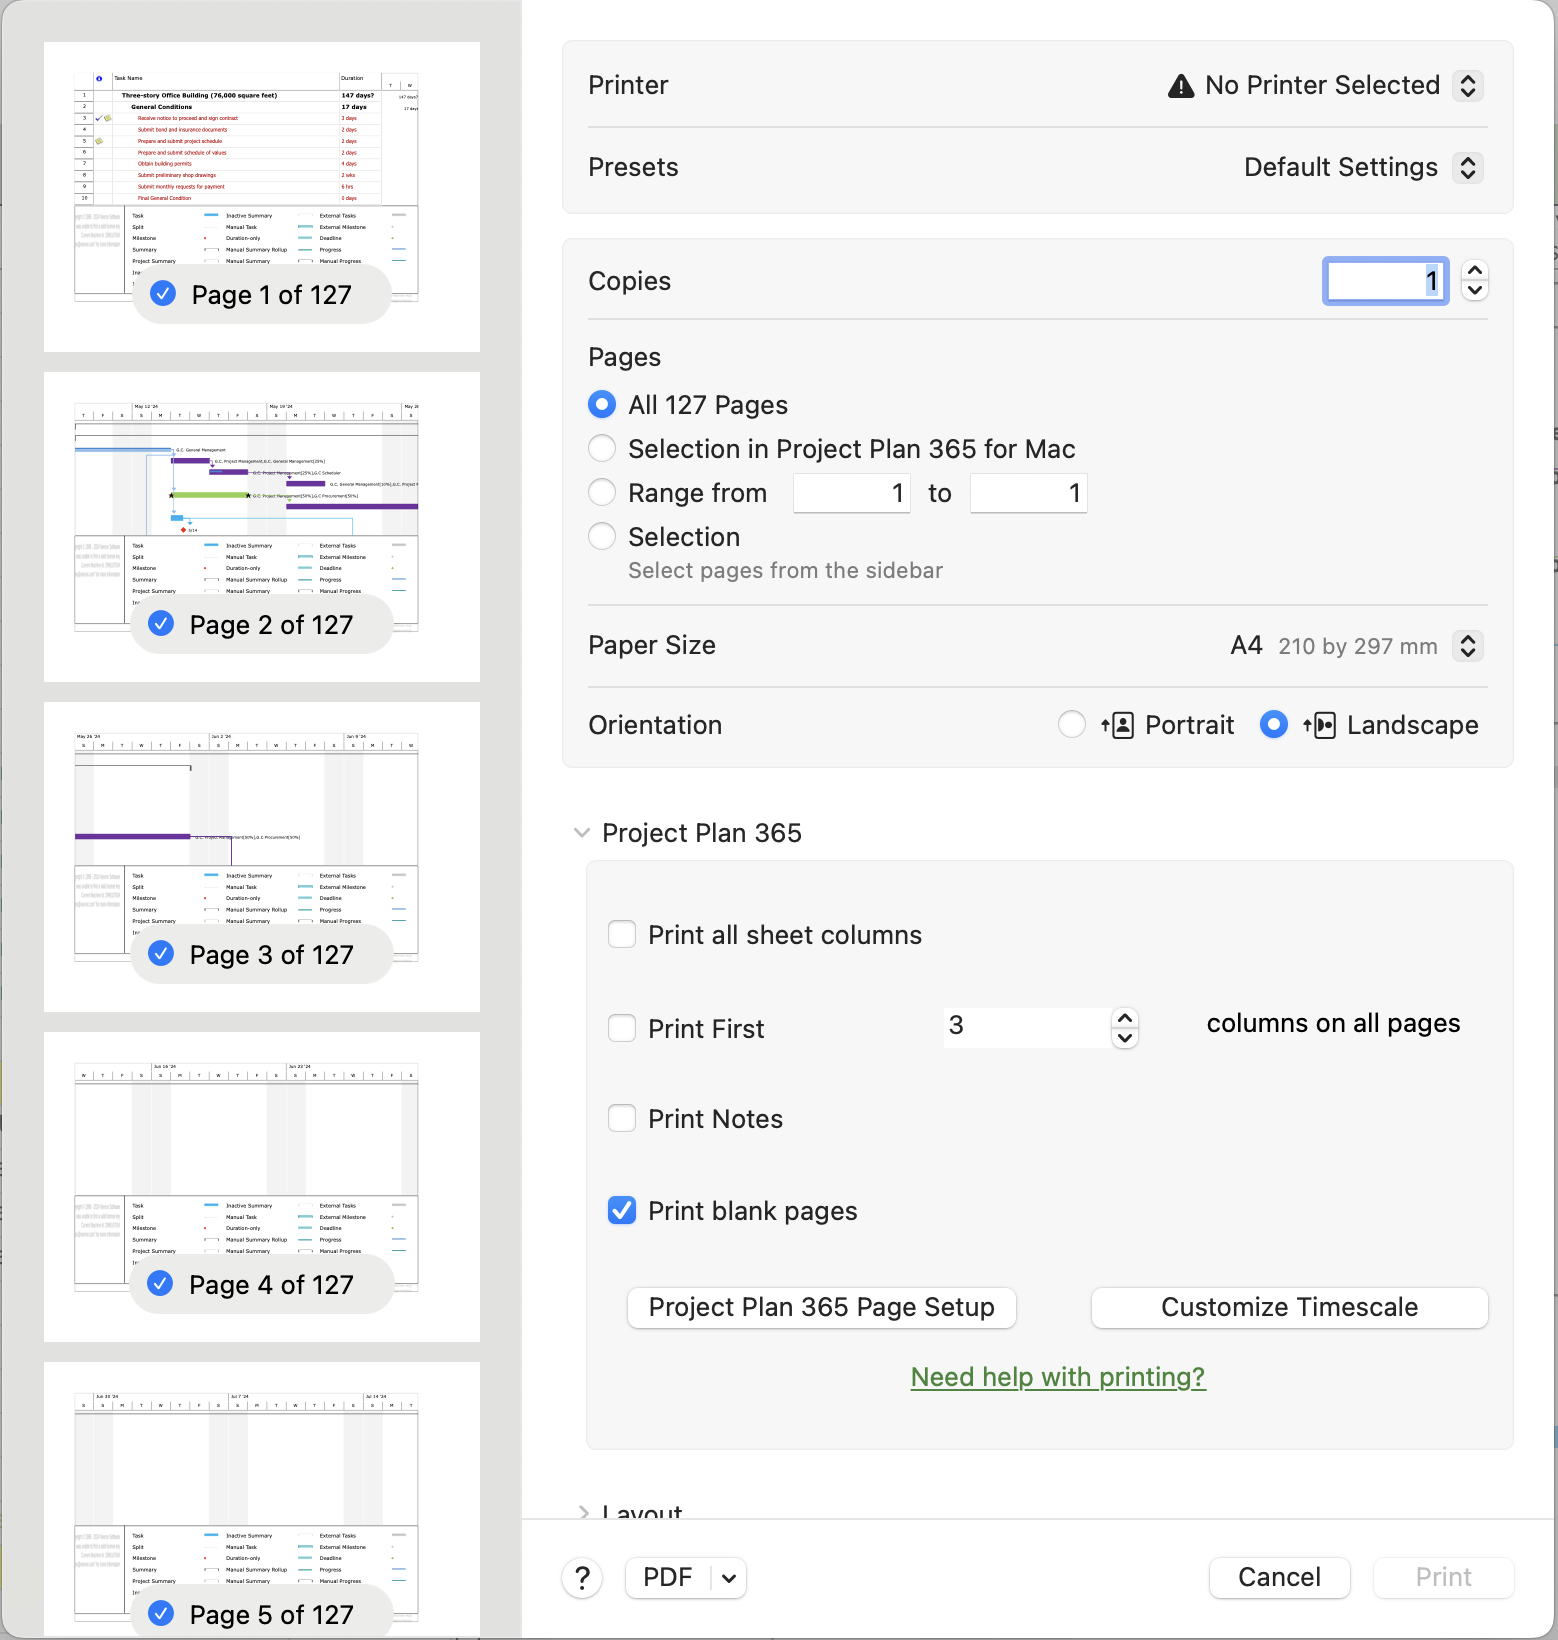
Set printing options, like:
- Copies - The number of copies - Type the number of copies to print.
- Print range - Pages - Select All to print the entire project.
- Paper size - select a different paper size.
- Page orientation - Select Portrait (vertical) or Landscape (horizontal). If the application cannot change the orientation for the selected printer, this option is unavailable. For new projects, the wider views (all except for those containing a grid only) have Landscape as the default orientation (i.e. Gantt Chart, Team Planner, Resource Usage). For imported projects, each view has the orientation it was originally saved with.
To print a section of the project, select Pages and type the first and last pages in the From and To boxes.
By selecting an entry (such as Page Attributes, Layout, Scaling, Margins) in the drop-down list, you can specify certain page setup options like: page orientation, margins, that will be applied to the active view. The following settings that you can made are saved with your project, when the current view is Gantt Chart: Orientation, Paper size, Adjust to, Fit to, Borders (on every page / none), Print first X columns, Print all sheet columns, Print blank pages, Print notes.
Project Plan 365 printing options
Specifies options for printing views that contain sheets, such as the Gantt Chart and Resource Usage view.
- Print All Sheet Columns: Select to print all columns of a sheet in the view. Clear this option to print only the visible columns. For example, your Gantt Chart might have only two visible Gantt table columns. If you select this option, all columns will be printed. If you clear this option, only the two visible columns will be printed. This option is available only for views with a timescale.
- Print First (number) Columns on All Pages: Select to print a specified number of columns on all pages, where (number) equals the number of columns you want to print. This option is available only for views with a timescale.
Note
If you have a project that prints on multiple pages both horizontally and vertically, the pages that encompass the left edge of the project will show the number of columns that are visible in the Gantt Chart, no matter what number is specified in Print First (number) Columns on All Pages. However, all other pages will show the number of columns you specify.
- Print Notes: Select to print all task and resource notes. The notes are printed as a group after the view has been printed.
- Print Blank Pages: Select to print the pages in a view that don't contain data - for example, in a large Gantt Chart. This option is not available for the Resource Graph, Task Sheet, Resource Sheet, or Calendar. This option is available only for views with a timescale.
Timescale printing options
The Timescale related options are available if you are printing the Gantt Chart, Resource Graph, Resource Usage view, or Calendar.
- Select All to print the project from start date to finish date.
- To print the project only between specified dates, select Dates and enter the start and finish dates in the From and To boxes.

Scaling printing options
- Select the Adjust To option to reduce or enlarge the printed image size. If you select this option, application automatically calculates the number of pages required to print the view, based on the number you enter. Type 100 if you don't want to reduce or enlarge the image size.
- Select the Fit To option to specify the number of pages across and the number of vertical pages that you want the view printed on. If you select this option, application automatically reduces the image size to fit on the number of pages you enter.
Note
In the Fit To option, you must specify the number of pages across and the number of vertical pages.
You can only scale printed views on Postscript printers using Postscript printer drivers that support scaling.

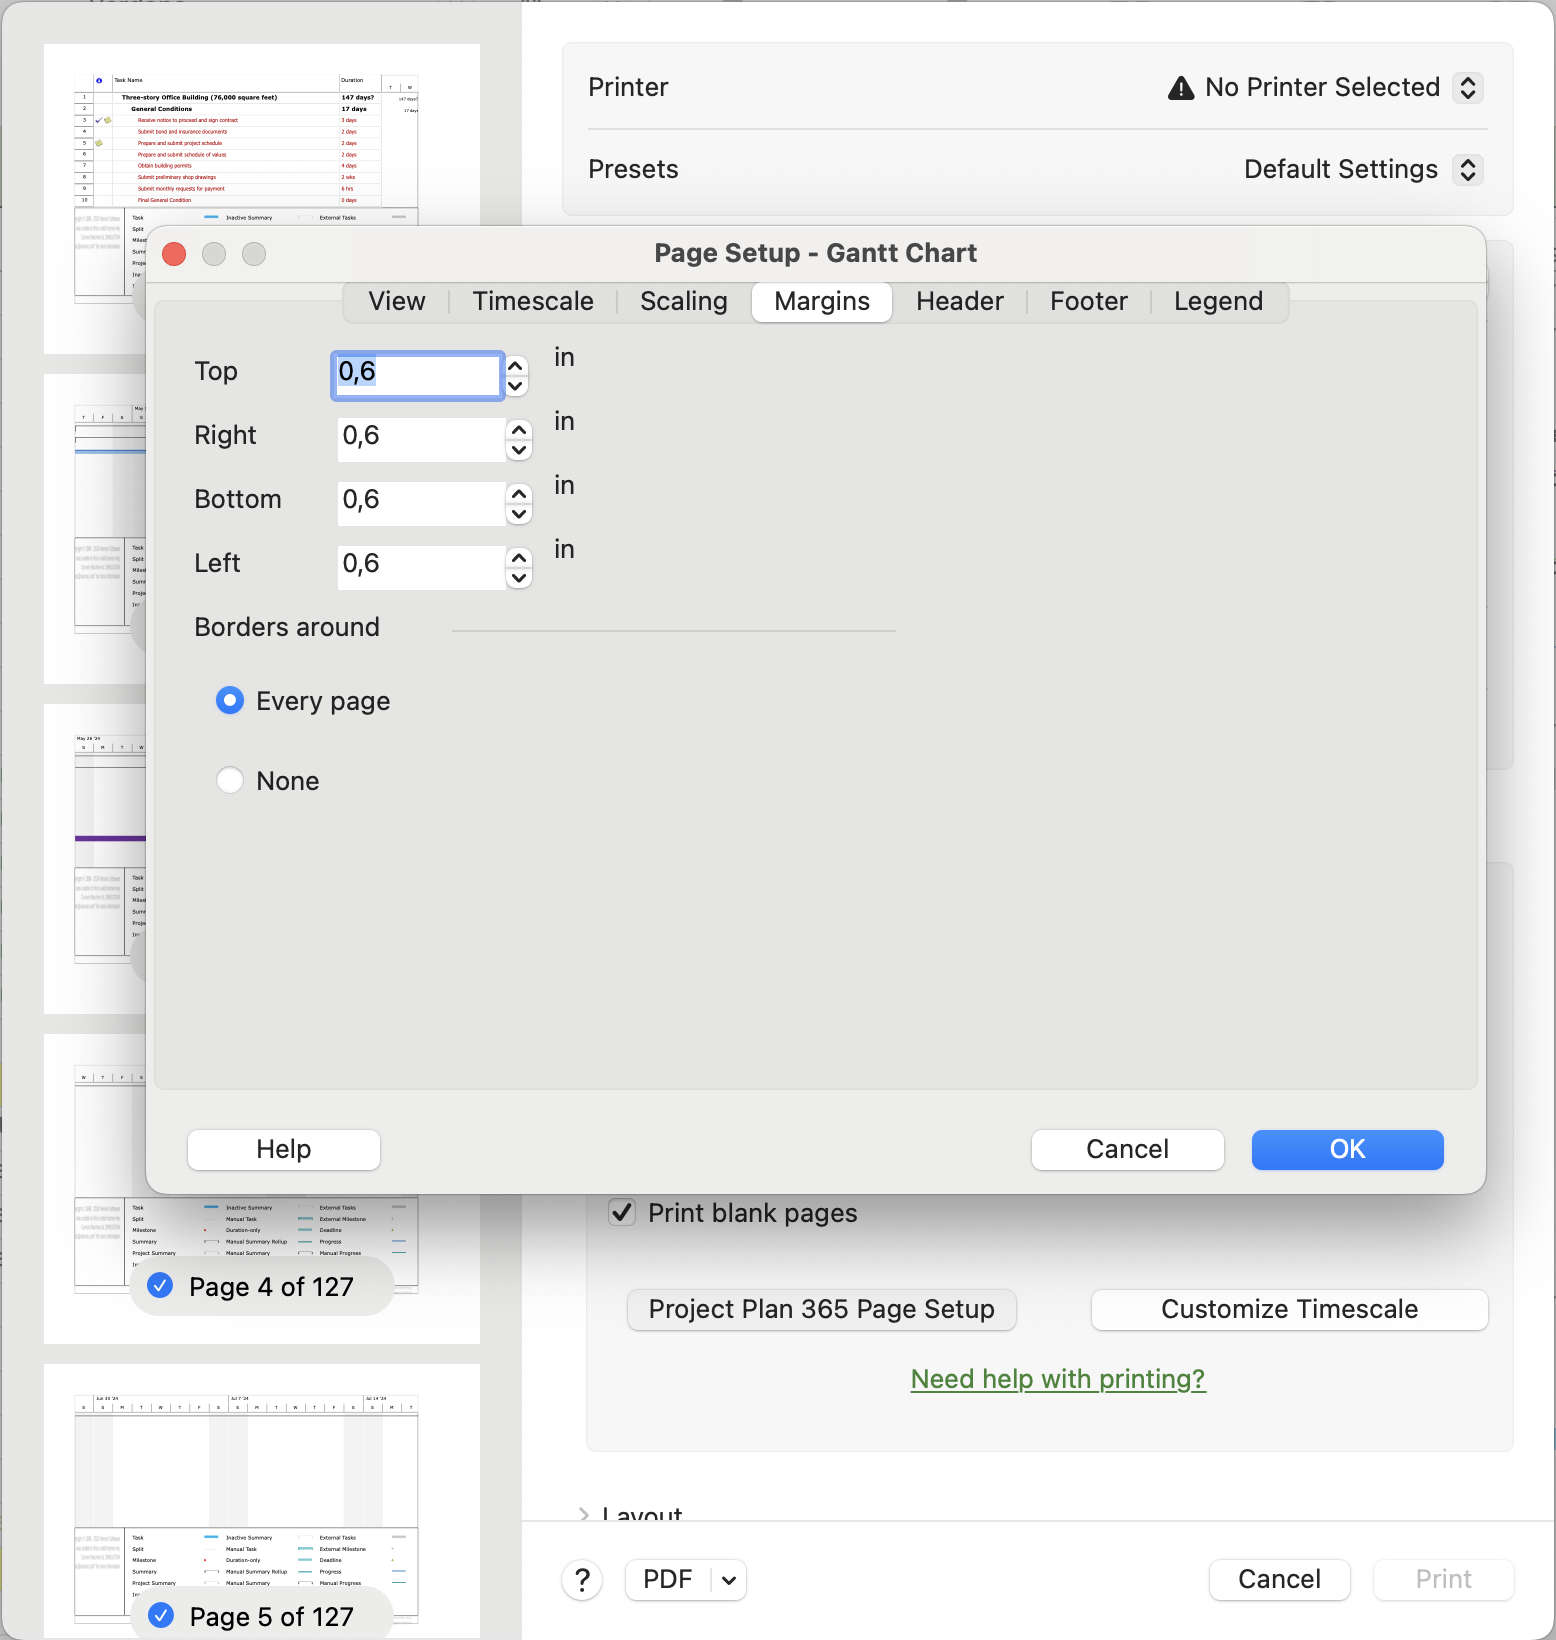
Margins printing options
Specifies margins and borders for printed views:
- Top, Right, Bottom, Left: Type the margin size you want.
- Borders Around: Select the border option you want.

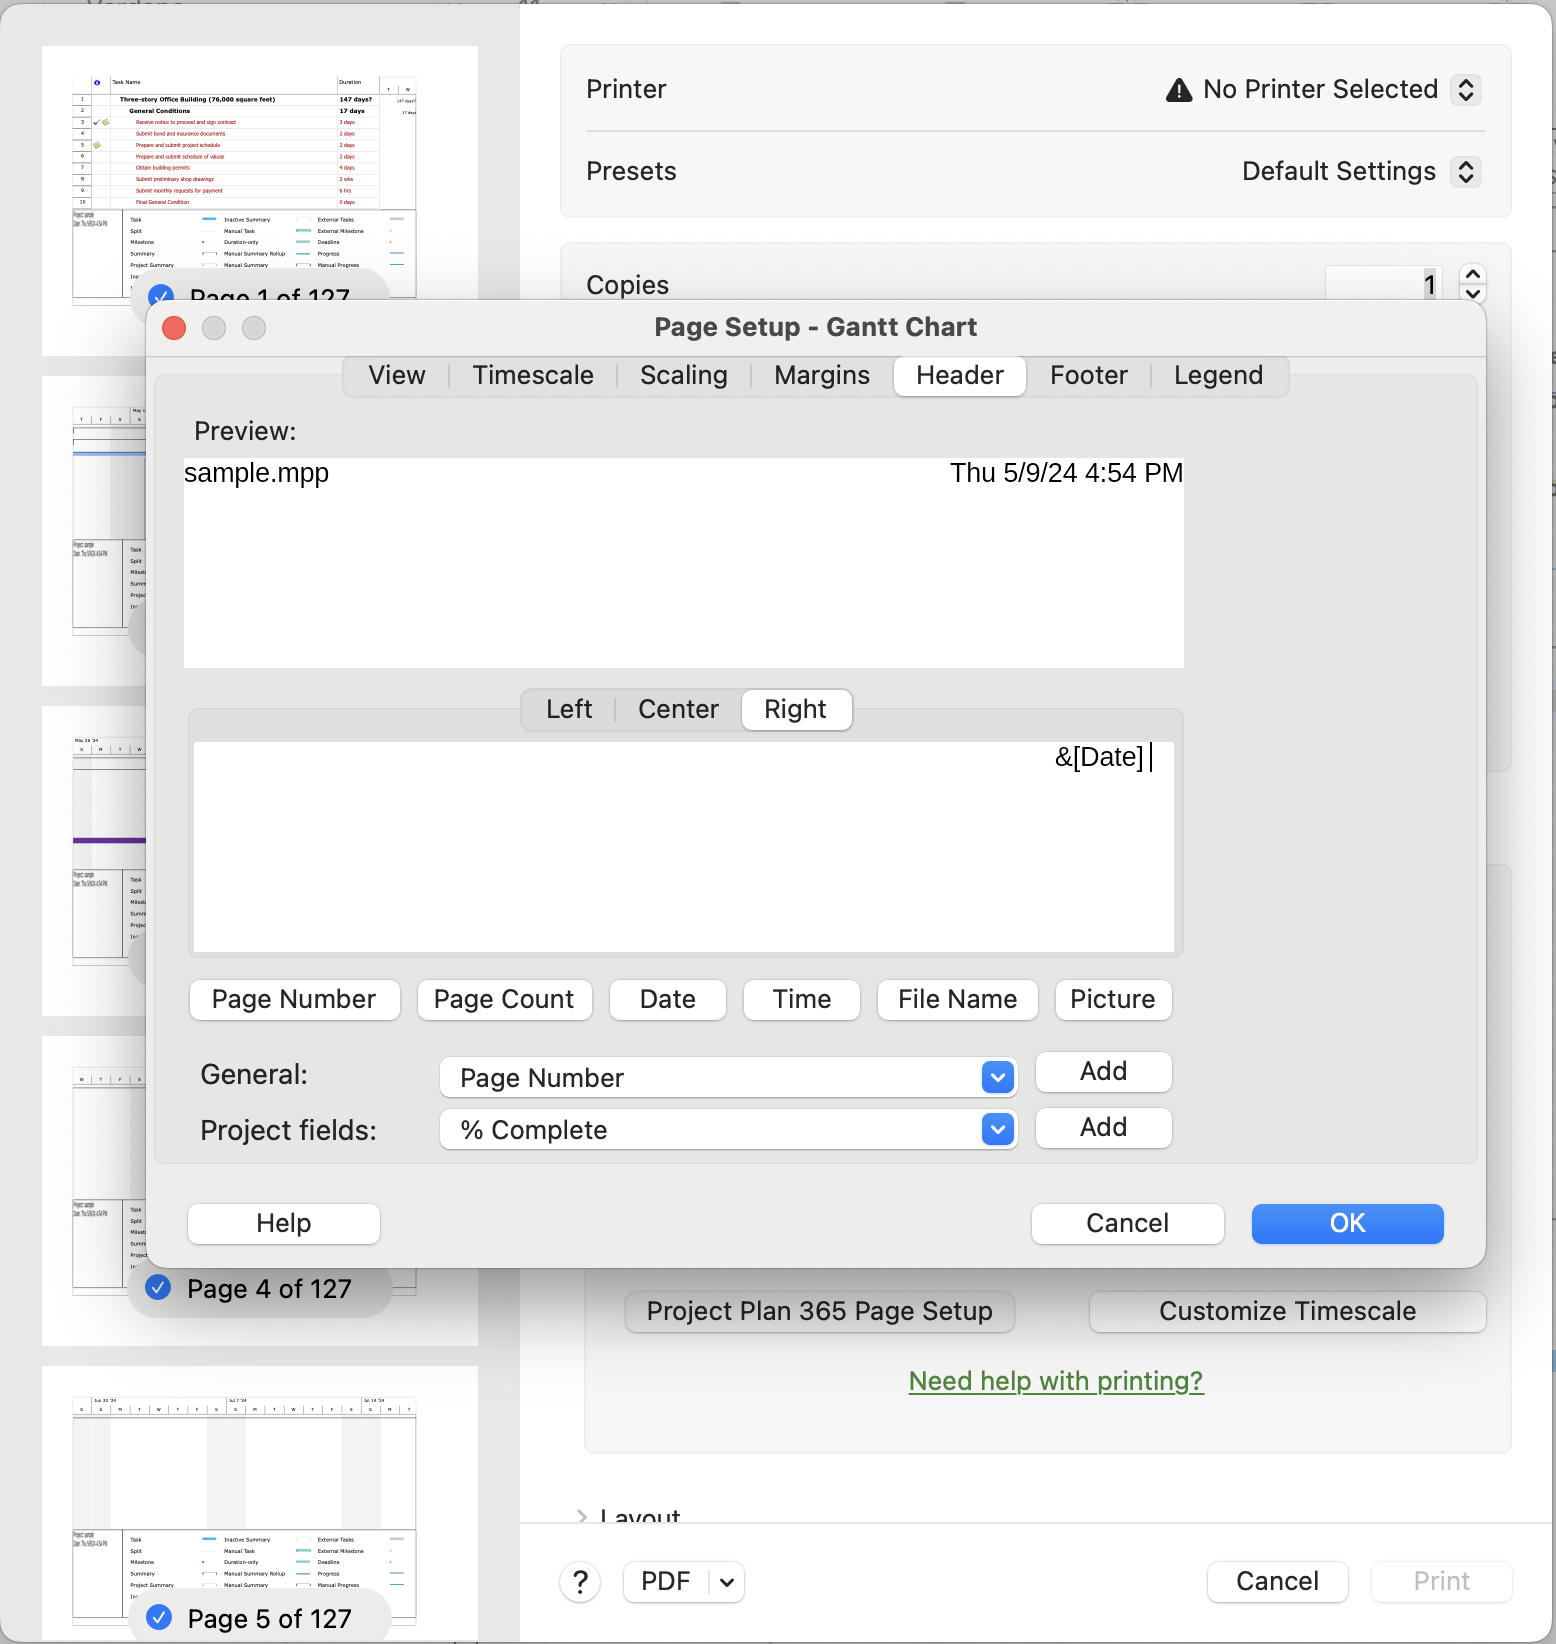
Header printing options
Click on the “Project Plan 365 Page Setup” button to open the Page Setup dialog and then go to “Header” tab.
This specifies and formats page headers for printed views and reports.
To see how your view or report will look when printed, use the Print Preview button.
Preview
To see how your view or report will look when printed, use the Print button then all changes will be available in Preview section.
Alignment
Select the Left, Center, or Right tab to specify the header's location on the page.
You can type header text directly in the Alignment box, or you can use the buttons and list box to insert specific types of information.
For example, to print the current date in the upper-left corner of each page each time you print the view or report, select the Left tab and then choose the button. The code & [Date] appears in the Alignment box and the current date appears in the Sample box.
To print the company name at the top and center of each page, select the Center tab. Then select Company Name from the list and choose the Add button. The code & [Company] appears in the Alignment box and the company name appears in the Sample box. If you have not entered a company name in the Summary tab of the Properties dialog box, no name is displayed.
The available buttons are:
Insert Page Number: Prints the page number on each page.
Insert Total Page Count: Prints the total number of pages.
Insert Current Date: Prints the current date.
Insert Current Time: Prints the current time.
Insert File Name: Prints the path and filename of the project.
Insert Image: Allows an image to be printed inside the header of the current view or report. The image can be resized by dragging the sizing handles surrounding it.
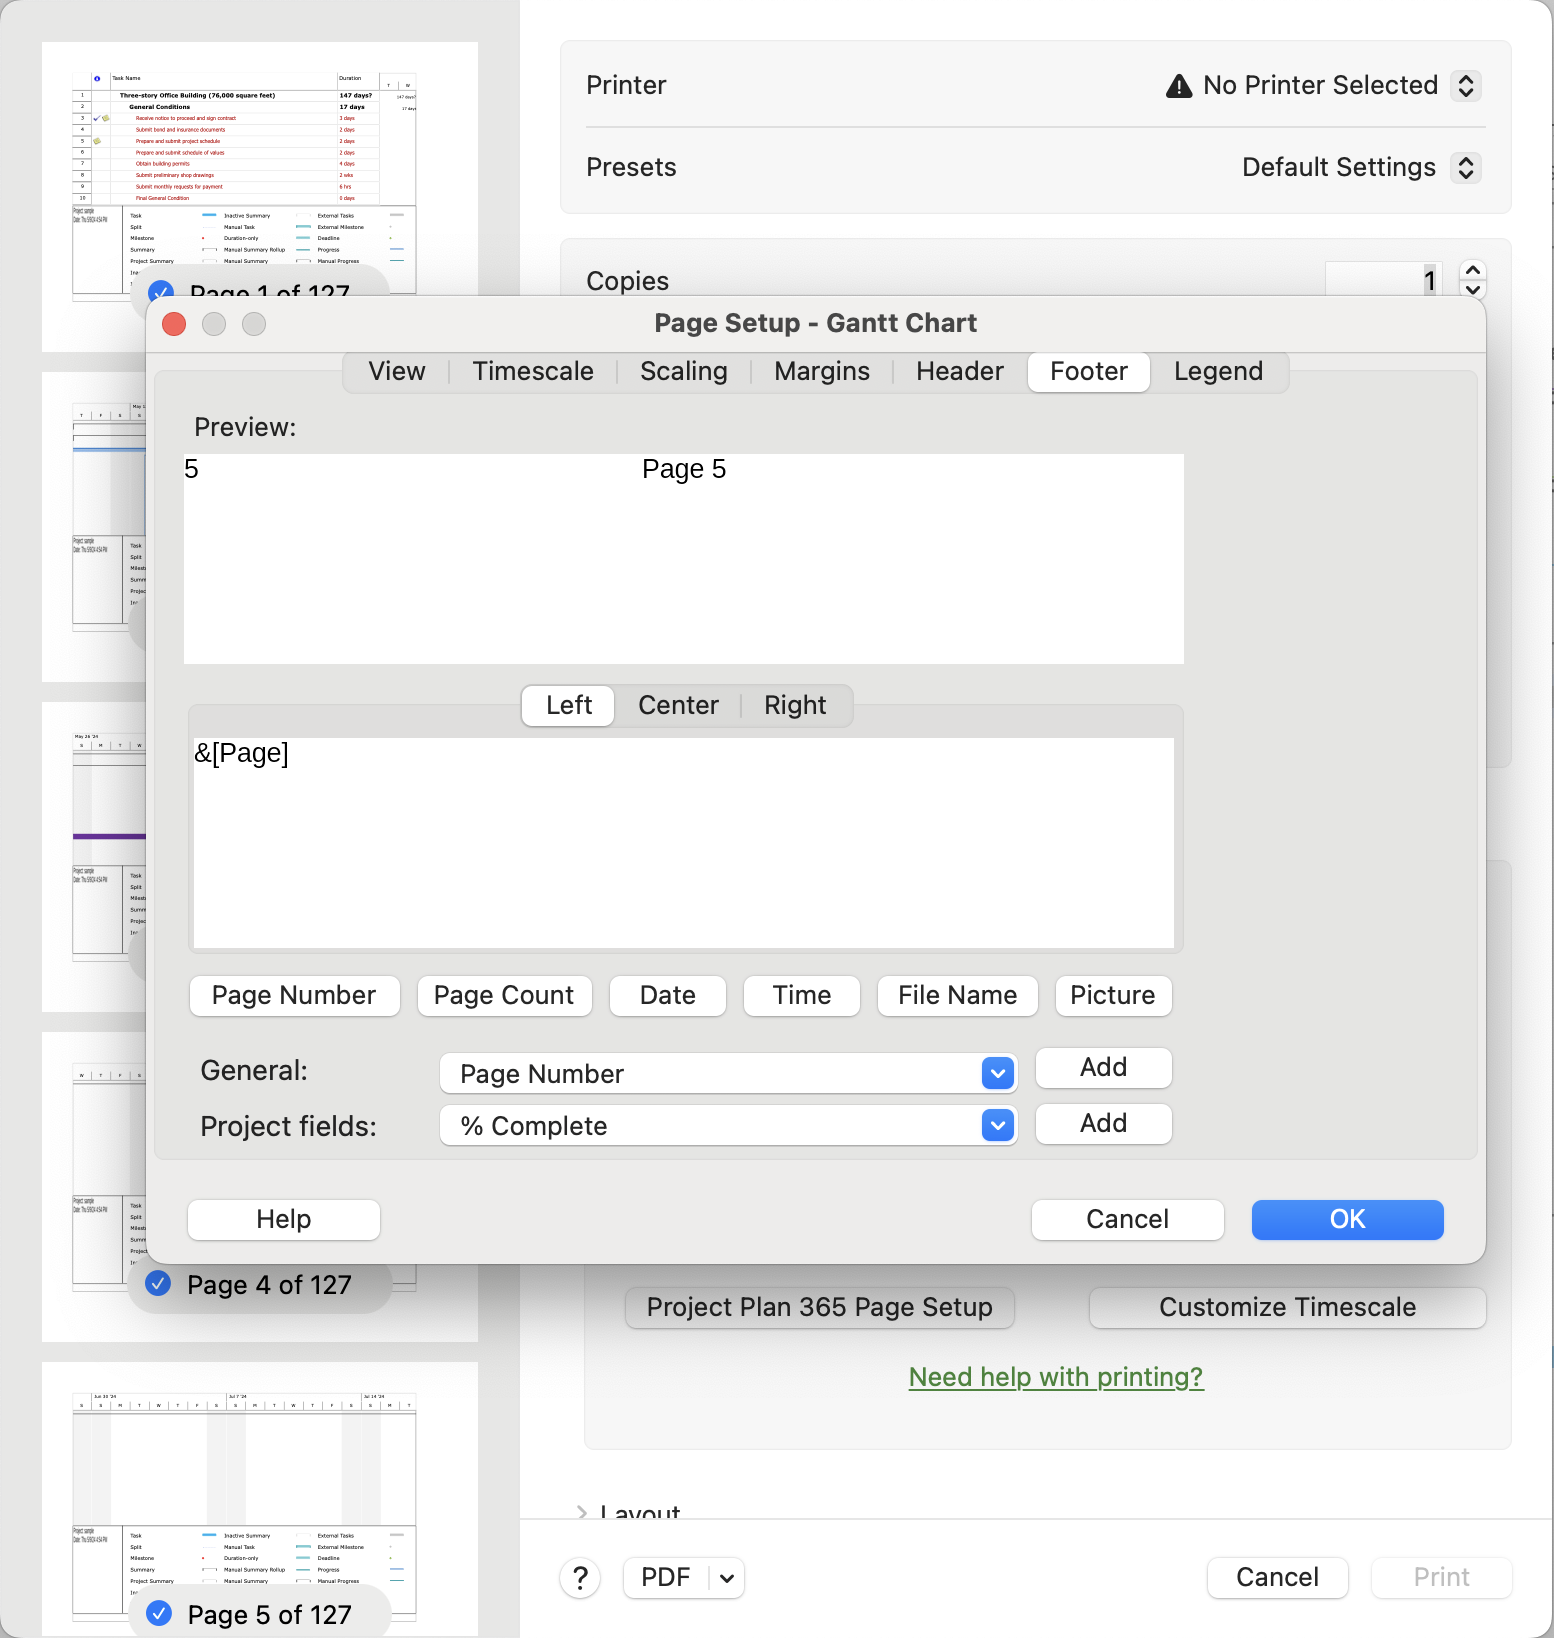
Footer printing options
Click on the “Project Plan 365 Page Setup” button to open the Page Setup dialog and then go to “Footer” tab.
This specifies and formats page footers for printed views and reports.
To see how your view or report will look when printed, use the Print Preview button.
Preview
To see how your view or report will look when printed, use the Print button then all changes will be available in Preview section.
Alignment
Select the Left, Center, or Right tab to specify the footer's location on the page.
You can type footer text directly in the Alignment box, or you can use the buttons and list box to insert specific types of information.
For example, to print the current date in the lower-left corner of each page each time you print the view or report, select the Left tab and then choose the button. The code & [Date] appears in the Alignment box and the current date appears in the Sample box.
To print the project manager's name in the lower-right corner of each page, select the Right tab. Then select Manager Name from the list and choose the Add button. The code & [Manager] appears in the Alignment box and the manager's name appears in the Sample box. If you have not entered a manager's name in the Summary tab of the Properties dialog box, no name is displayed.
The available buttons are:
Insert Page Number: Prints the page number on each page.
Insert Total Page Count: Prints the total number of pages.
Insert Current Date: Prints the current date.
Insert Current Time: Prints the current time.
Insert File Name: Prints the path and filename of the project.
Insert Image: Allows an image to be printed inside the footer of the current view or report. The image can be resized by dragging the sizing handles surrounding it.
Legend printing options
Click on the “Project Plan 365 Page Setup” button to open the Page Setup dialog and then go to “Legend” tab.
Specifies and formats a legend for the Gantt Chart.
Every Page / Legend Page / None
By default, the legend is set to Legend Page.
Layout printing options
Specifies pages per sheet and Borders
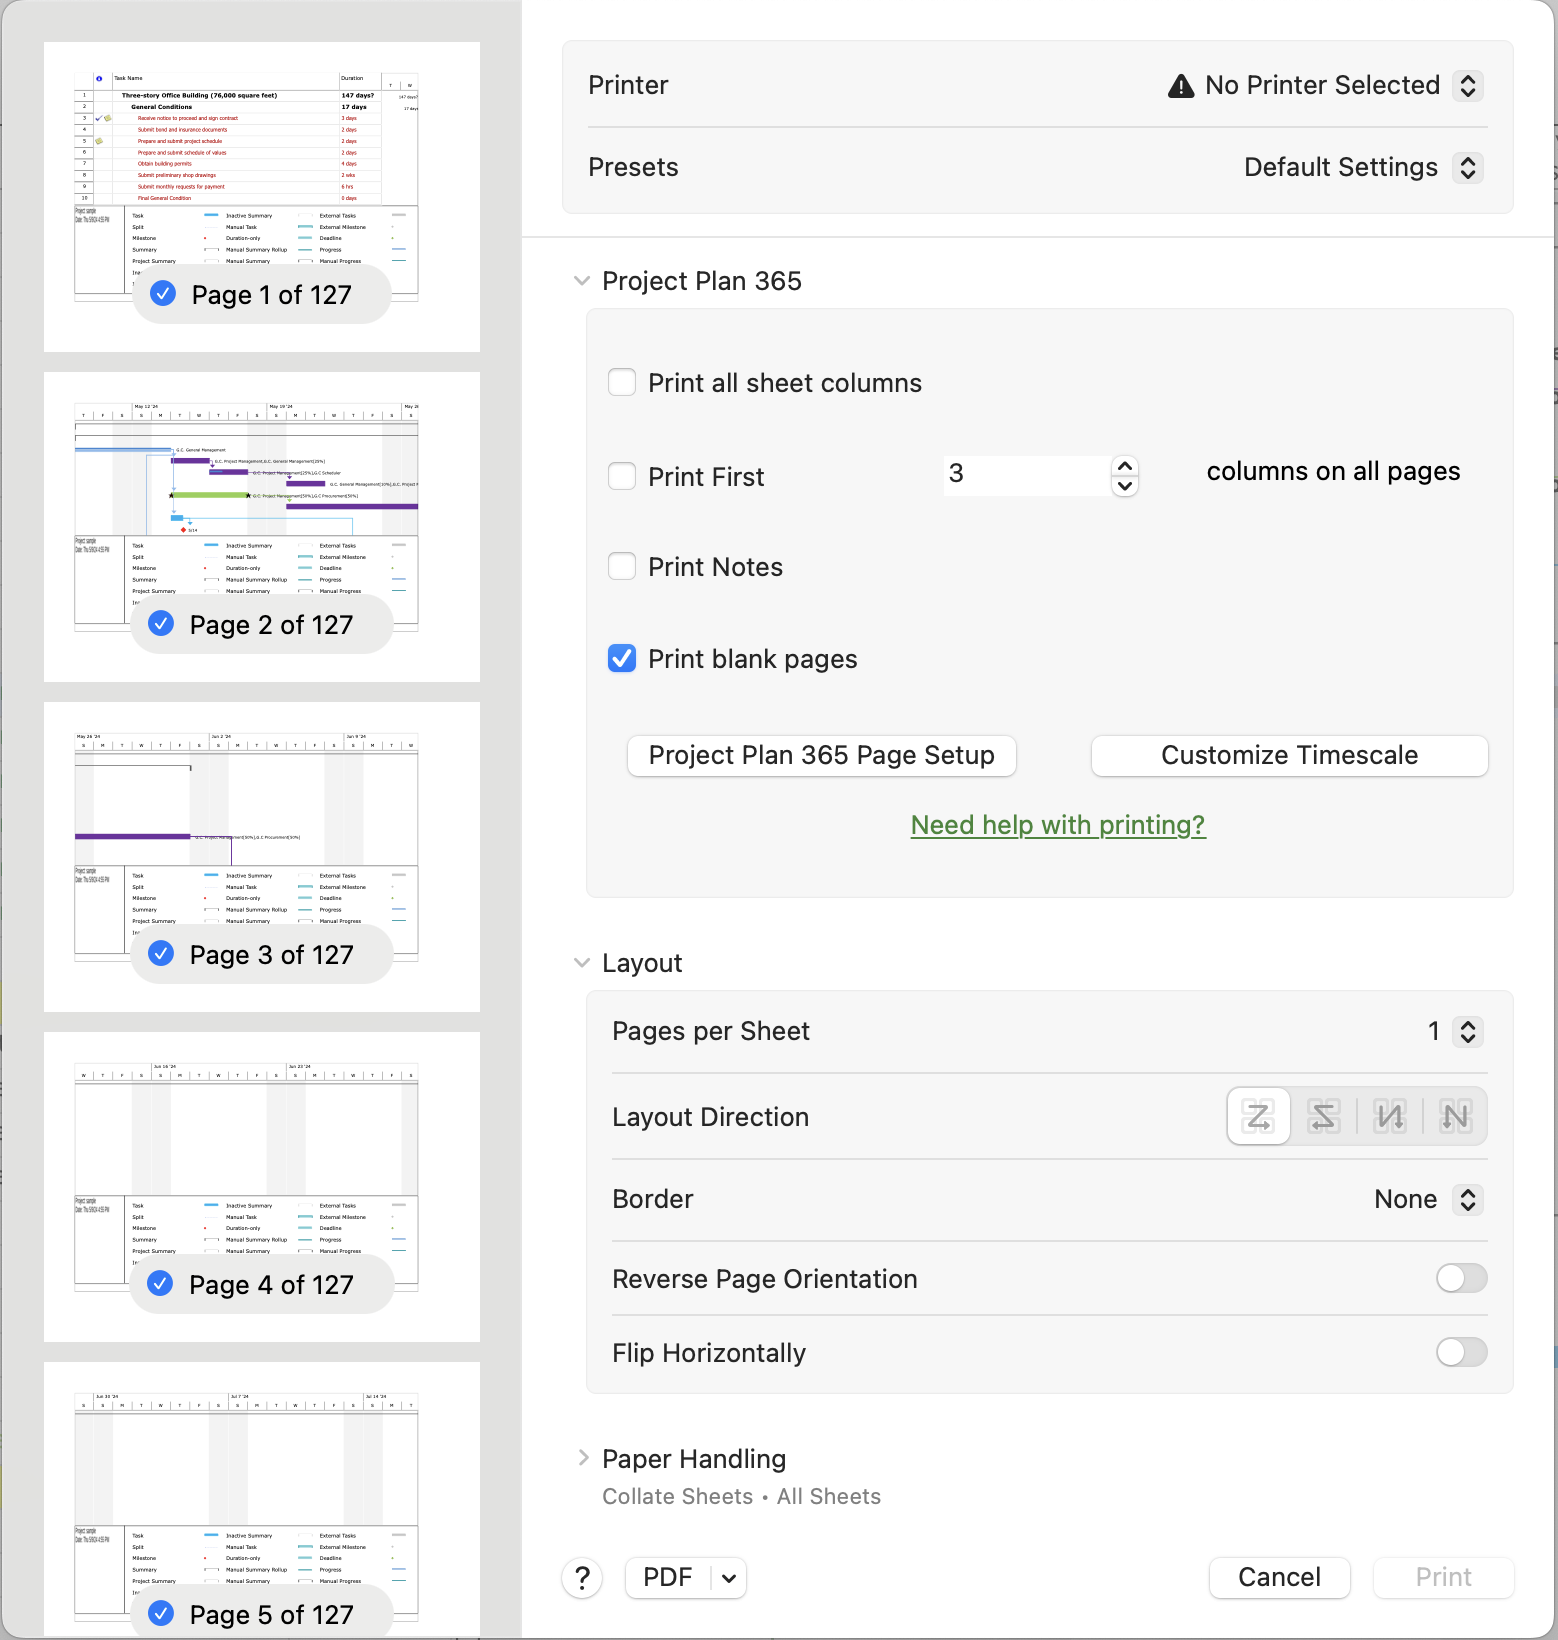
Other print options: Paper Handling
Print Preview section - Displays the active view as it will look when printed. The pages to be printed display the information according to the settings applied.
PDF - options will open list with extra options:
Open PDF in Preview - Displays the active view as it will look when printed in PDF format
Save as PDF - Save the information from current printed view in PDF file
Save as PostScripts - Save the information from current printed view in PostScript file
Add PDF to iBooks - Will add current printed view in iBooks
Mail PDF - Opens the Untitled Message window, with the current printed view attached in the Attachment field
Save PDF to Web Receipts Folder - Will save current printed view (PDF generated) in Web Receipts Folder
Send PDF via Messages - Opens the Untitled Message window, with the current printed view attached in the Attachment field
Edit menu - Opens the Edit menu