Set Start Finish date hours
Online Help > Set Start Finish date hours
What does the “Set Start Finish date hours” functionality do?
The Set Start Finish date hours functionality, as the name describes it, allows you to set the start and the finish date hours to your tasks.
How do I set start finish date hours?
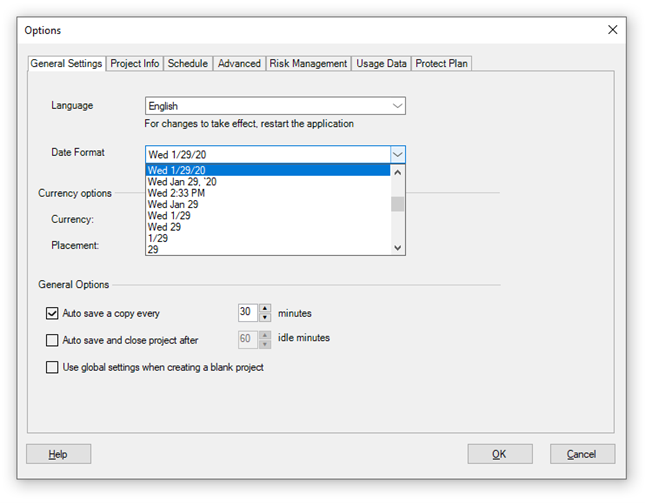
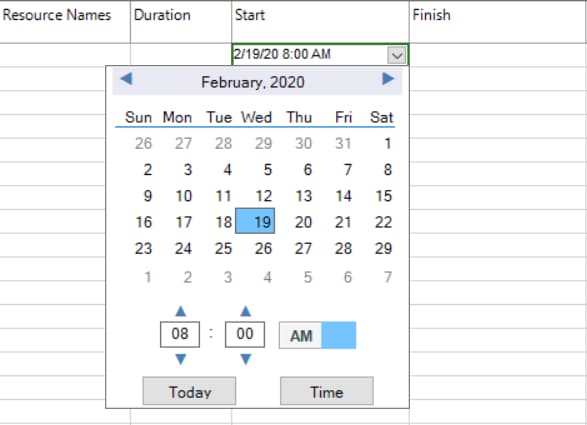
Before starting to schedule your project by setting start and finish dates, you can use the Date Format option on the File menu in the Options dialog box to specify the date format used to display information in date fields. For a task you can enter the time and the date in any order, or you can use calendar picker to select desired date and hour.
Step by step on how to set start/finish date/hours:
- Go to File menu - Options.
- Under the General Settings tab, select a Date Format.
- Enter a time and a date in the Start/Finish You can enter the time and the date in any order, or you can use calendar picker to select desired date and hour. For example, you can type 8:00 AM 2/19/20 or 2/19/20 8:00 AM.
Note: If you don't include A.M. or P.M. when entering a time, and the default time format is the 12-hour clock, application sets the time to P.M. unless you enter a value between 7:00 and 11:59, in which case application sets the time to A.M. The time format is controlled by Operating System and is set using the Control Panel application.
| Related | Calculation Duration, Start, Finish | Change task scheduling options defaults for days, weeks, and months | Set the Amount of Work That People Perform on Tasks | ||
| Platform | Windows | Mac | iOS | Web | Android |
| ✔ | ✔ | ✔ | ✔ | ✔ | |
| Product | Project Plan 365 | ||||
| Article ID | 83 | ||||
| Date | 4/10/2023 | ||||


